
🪄 AI Summary
Setting Up Your Remote Podcast with Riverside in 5 Steps
- Sign Up and Set Up Your Account: Visit Riverside.fm, create an account, and customize your studio.
- Create a New Recording Session: Invite guests directly or schedule recordings via email or link.
- Set Up Your Recording Environment: Use a quality camera, lighting, and wired headphones for optimal audio and video.
- Configure Riverside Settings: Adjust audio/video settings and run a test recording before starting.
- Record and Edit Your Podcast: Start recording, share with your team, and use Riverside’s editing features for final touches.
Read the blog for detailed information.
In this blog, we will discuss how to set up your remote podcasting using Riverside.fm.
In case, you prefer a quick interactive version, check this demo:
Remote podcasts are an excellent alternative to traditional in-person recordings.
Limited resources with guests across different geographical locations? Remote podcasting is here to save the day for you!
It eliminates the need for a physical studio, which significantly reduces costs related to renting space, purchasing high-end recording equipment, and commuting. Remote podcasting also allows for greater flexibility in scheduling, as hosts and guests can record from the comfort of their own homes at convenient times, accommodating different time zones with ease.
But here’s the problem with most remote recording the way it happens now:
- It happens on either Zoom, Google Meet, or Teams - which means the recording is done at the streaming quality (read poor quality)
- There aren’t different video & audio tracks which makes editing for socials a pain
- No local recording for each guest which means lower-quality output
- If the internet connection drops for any of the guests then that part of the conversation is not recorded
- Everyone on the call is recorded, which means you cannot have a producer managing things on the backend like an actual show.
This is where Riverside comes to the rescue. It is a popular platform for recording high-quality remote podcasts with ease. Here’s how:
- It records locally on your computer and then uploads it. This ensures the highest quality audio and video recording.
- You get up to 4K video quality and in case you don’t have an external camera, you can connect your mobile camera and use it as a webcam.
- Riverside's "Join as a Producer" feature lets you invite someone to handle technical aspects like volume settings and managing the waiting room, allowing you to focus on your content. Producers can also choose not to be recorded on the call.
Here's how to set up your remote podcast using Riverside in five easy steps.
Step 1: Sign Up and Set Up Your Account
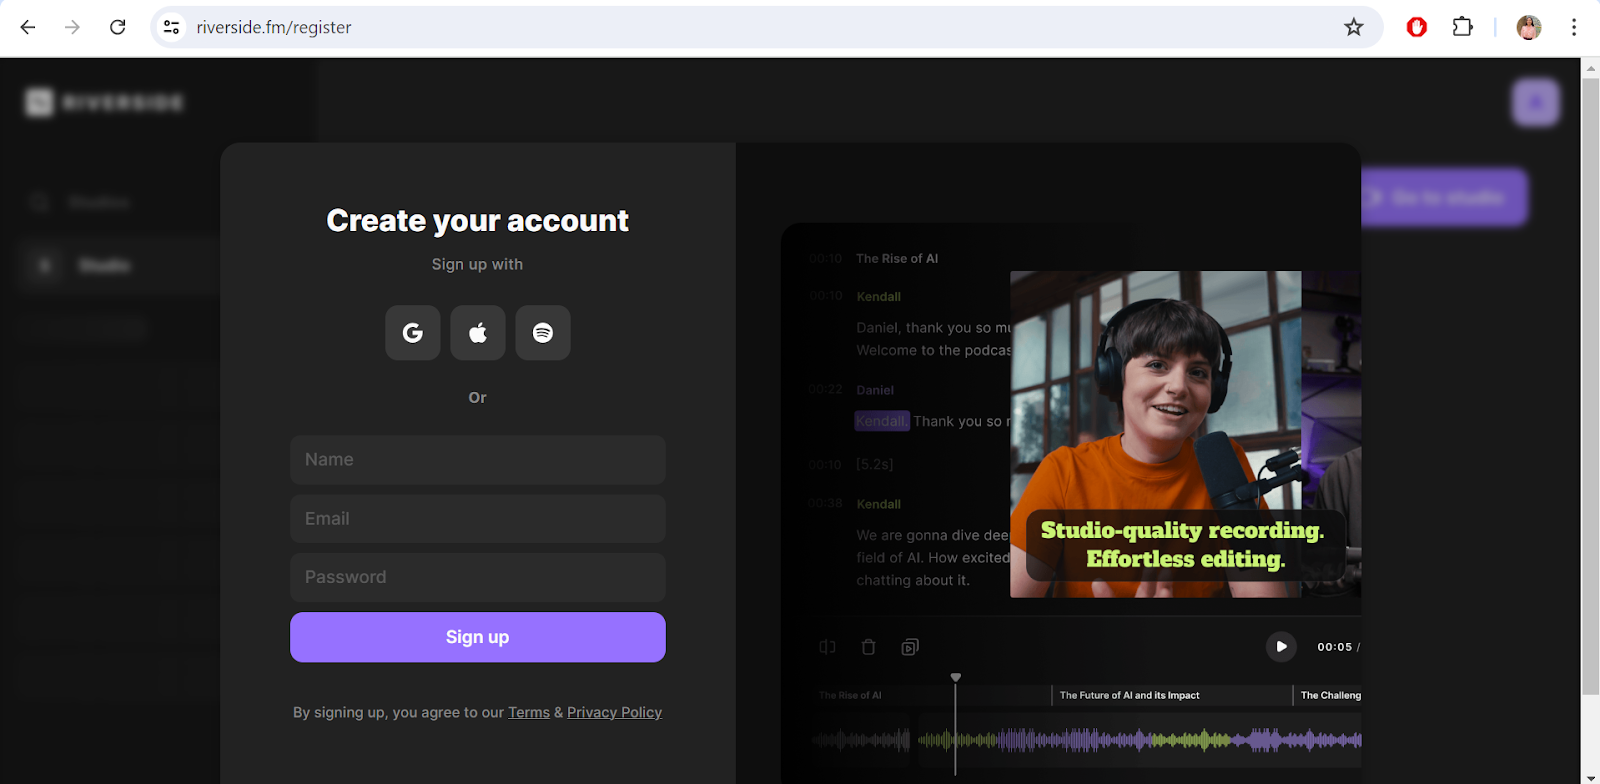
- Go to the Riverside.fm website and click on Get Started.
.jpeg)
- Add your name, email ID and a password to sign up
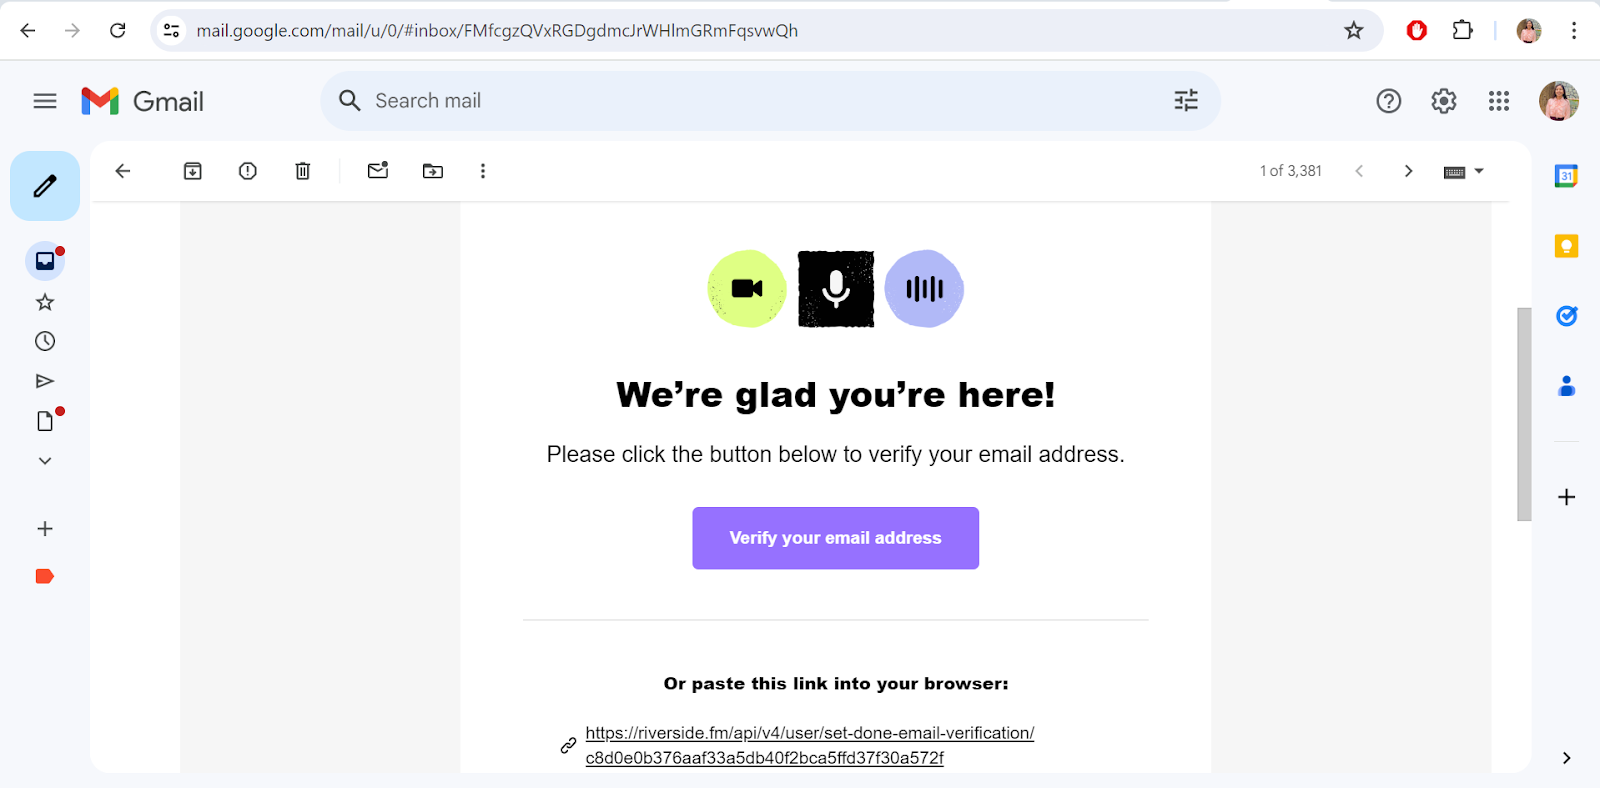
- Verify your Email ID
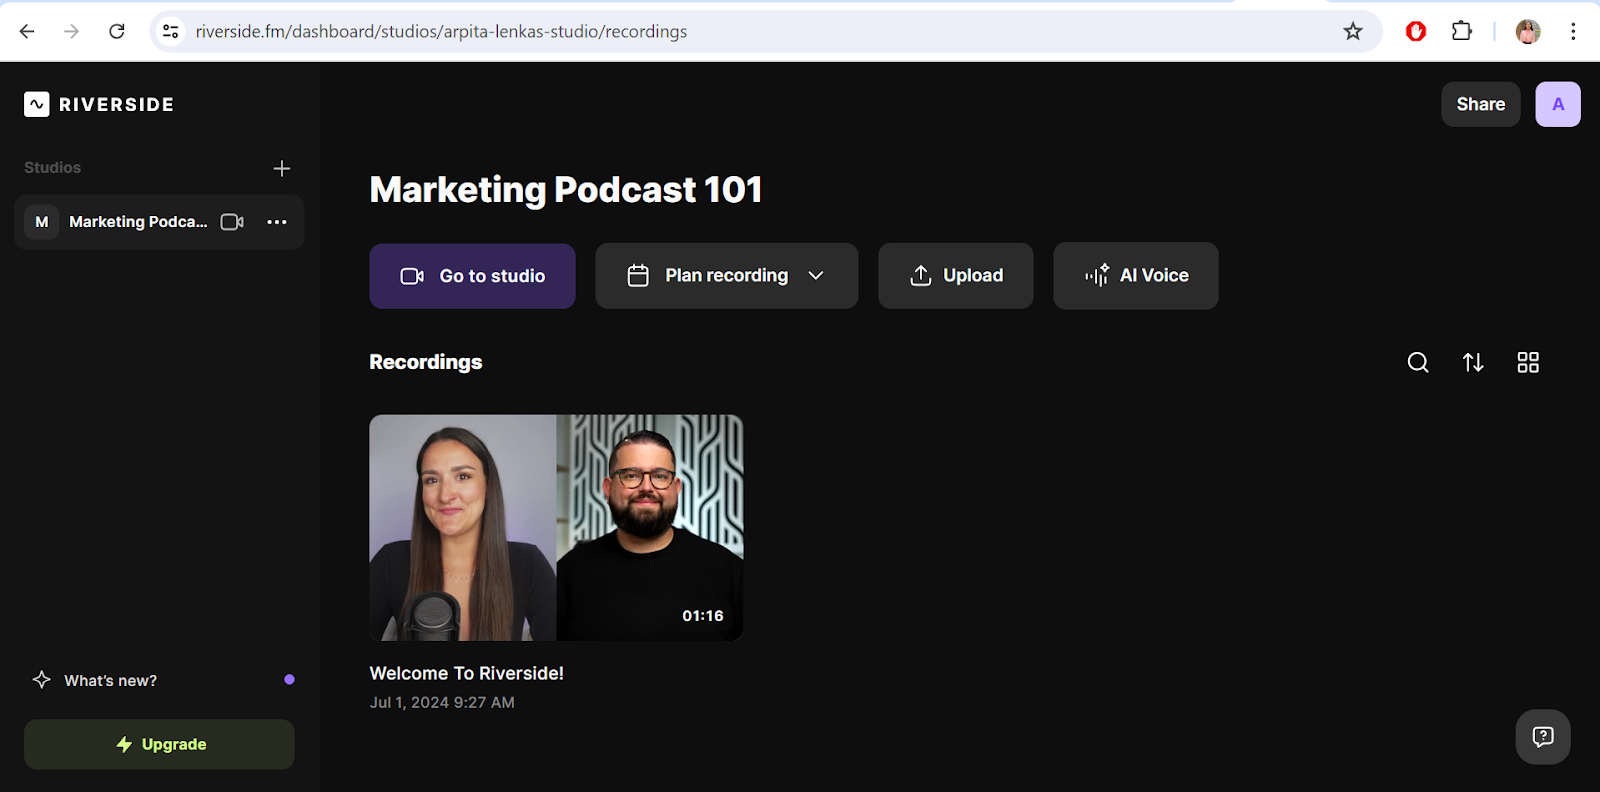
- This is how your dashboard will look like. On the left tab you can see your studio. Click on the 3 dots to rename your studio.
- Complete your studio podcast by going to the studio and adding details like logo, designs, selecting transcript language, and other details. When you hover on the 3 dots you will see an option Go to Studio > Select Headphone Setting > Setting.

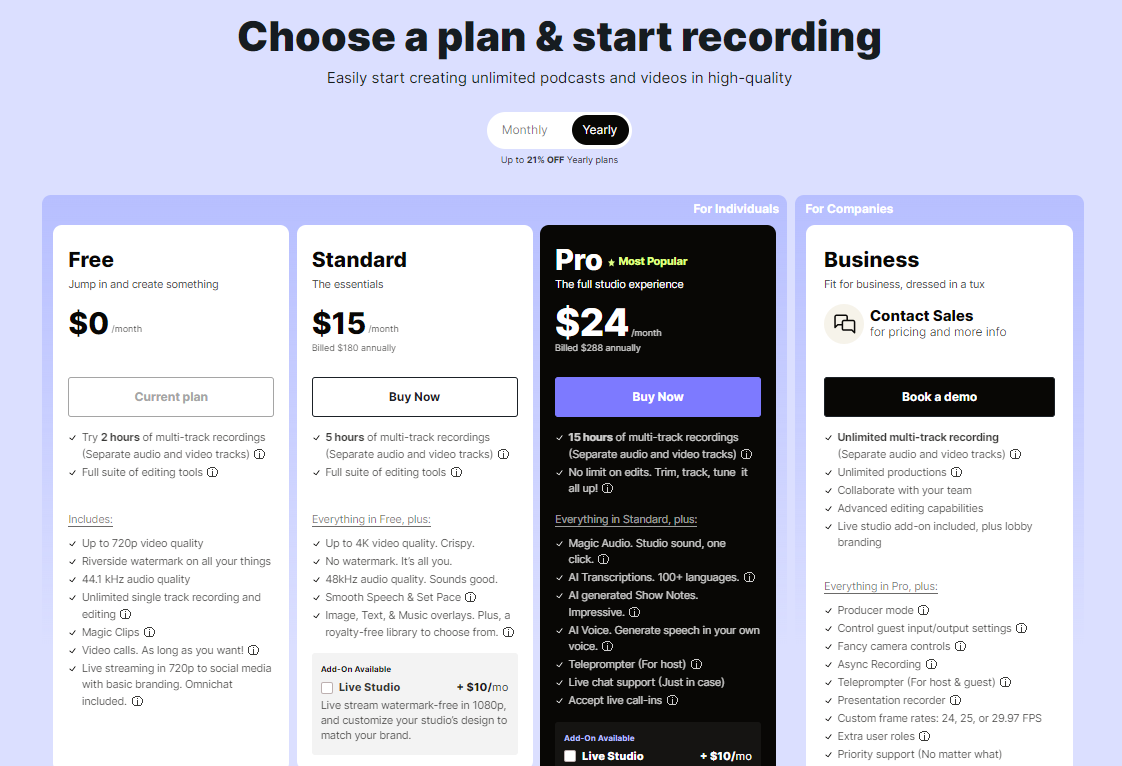
The free plan includes 2 hours of recording. Use this to explore the tool and all the features. Once you are confident about the tool you can opt for one the plans based on your need:
Step 2: Create a New Recording Session
- You can either directly invite your guest or schedule a recording
.jpeg)
- You can even choose their role while inviting. There are 2 options here. Either you can copy the link or send them an email invite.

- When you schedule a recording it appears in the top tab like this and can be added to your Google Calendar as well.
.jpeg)
Step 3: Set Up Your Recording Environment
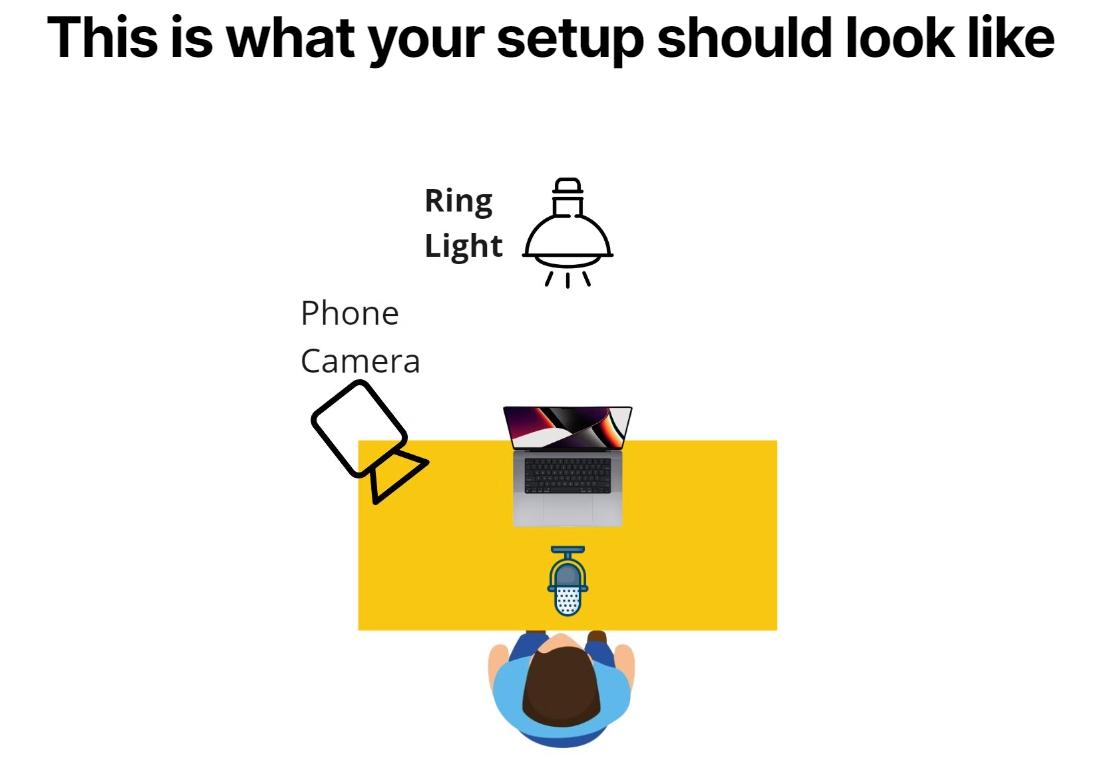
Here are a few basic things you'll need to arrange for remote podcasting:
- Laptop/Phone Camera: A good quality camera is essential for clear video recording. Riverside lets you use your mobile as a webcam.
- Basic Lighting Setup: Ideally, use a ring light for consistent and even lighting. While natural sunlight can also be used, it is not always reliable due to changes in weather and time of day.
- Good Wired Headphones: Most remote podcasting software recommends using wired headphones to ensure clear audio. Alternatively, you can use a dedicated microphone for even better sound quality.
Here’s an example of a basic budget-friendly setup:
If you are looking for a detailed equipment setup guide to look & sound 10X Better On your video podcasts then you can download our free guide.
Step 4: Configure Riverside Settings
Before starting the recording, check your audio and video settings in Riverside. Ensure that the correct microphone and camera are selected. Test your audio levels and adjust the microphone gain if necessary.
You can use helpful riverside features like Teleprompter.
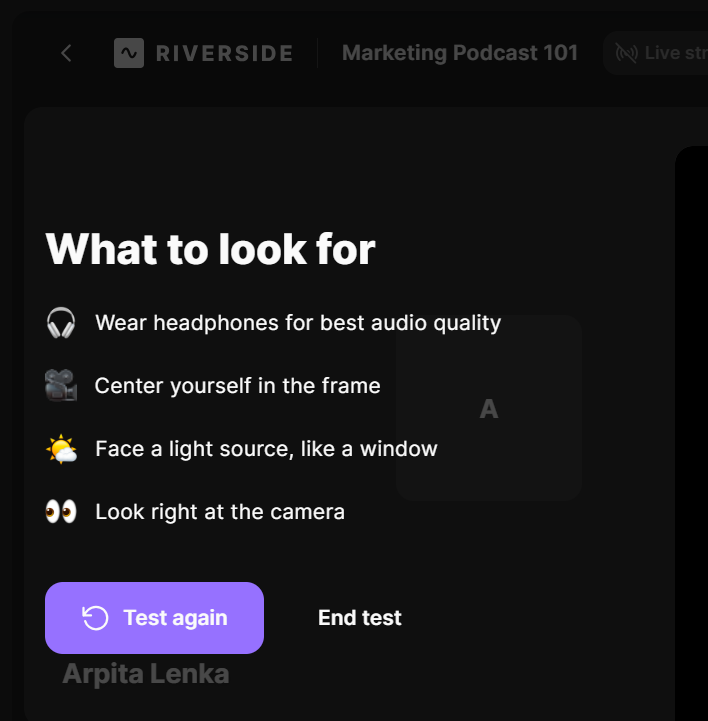
Before you hit record you can opt for test recording and follow this checklist:
Step 5: Record and Edit Your Podcast
- When everything is set up, click the "Record" button to start your session. Riverside will record both audio and video in high quality.
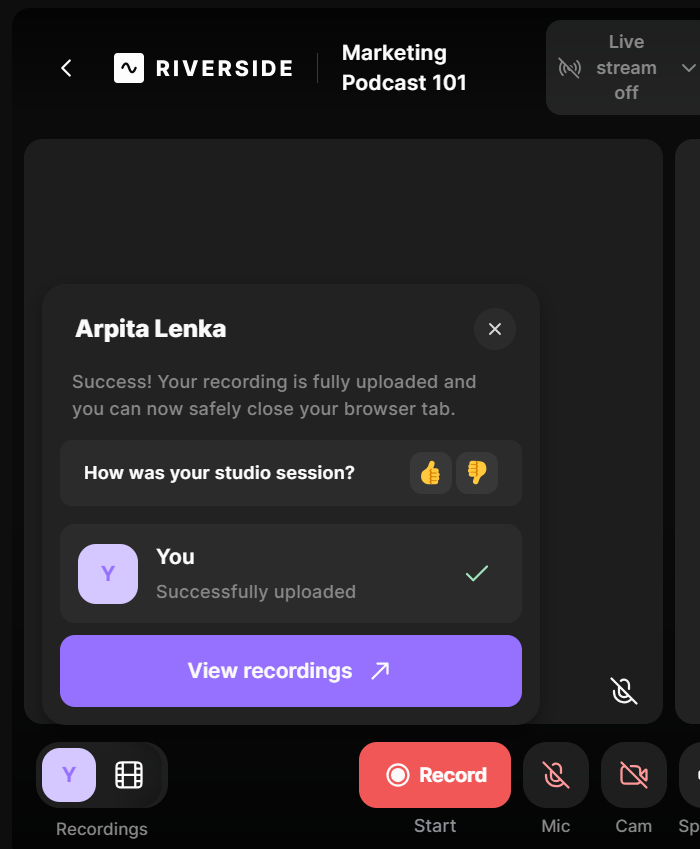
- Once the recording is done you can either share the recording link with your editing team or download it.
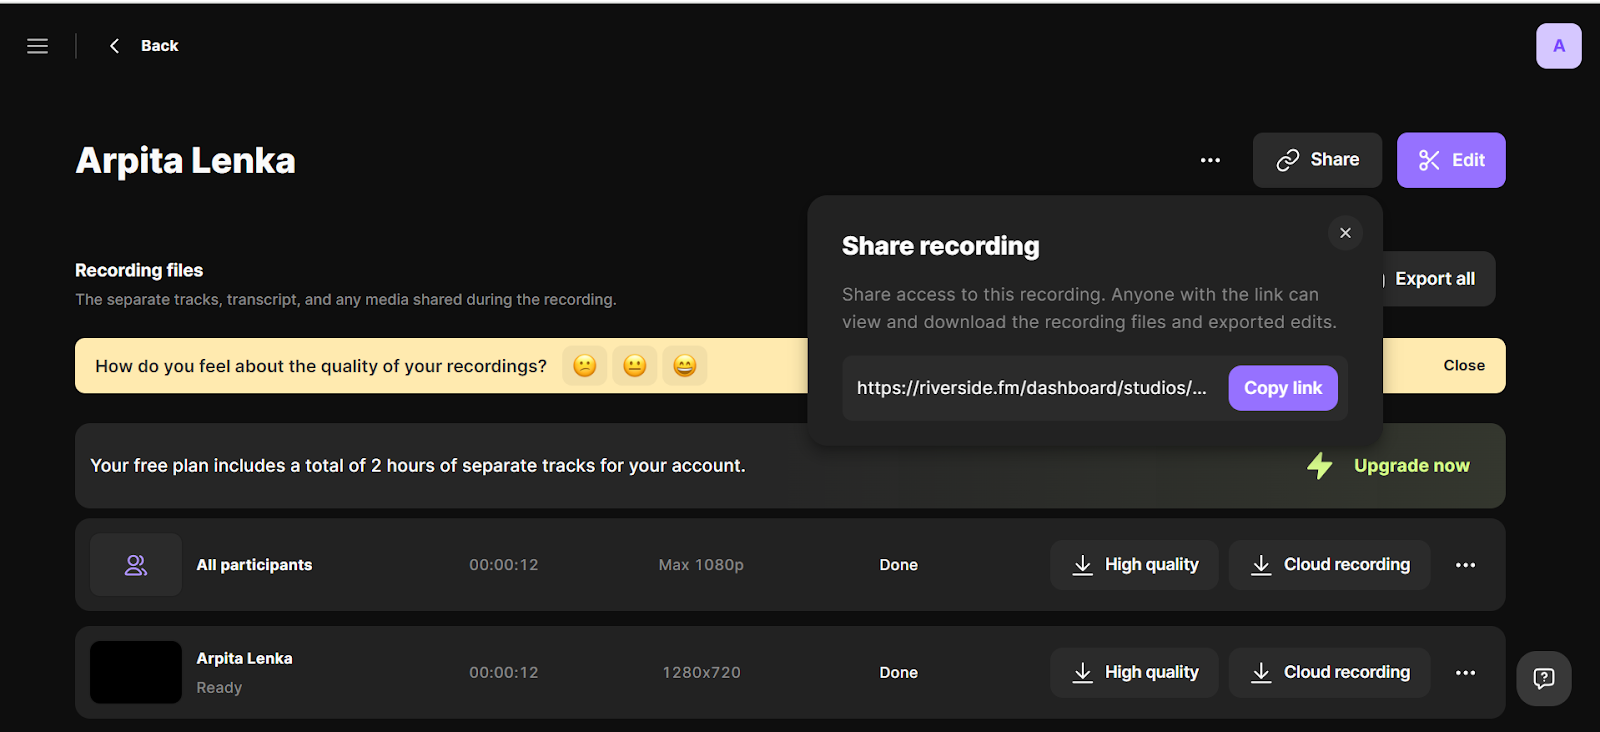
- You can also edit your episodes and clips on Riverside and even choose the frame size for your clips.
-
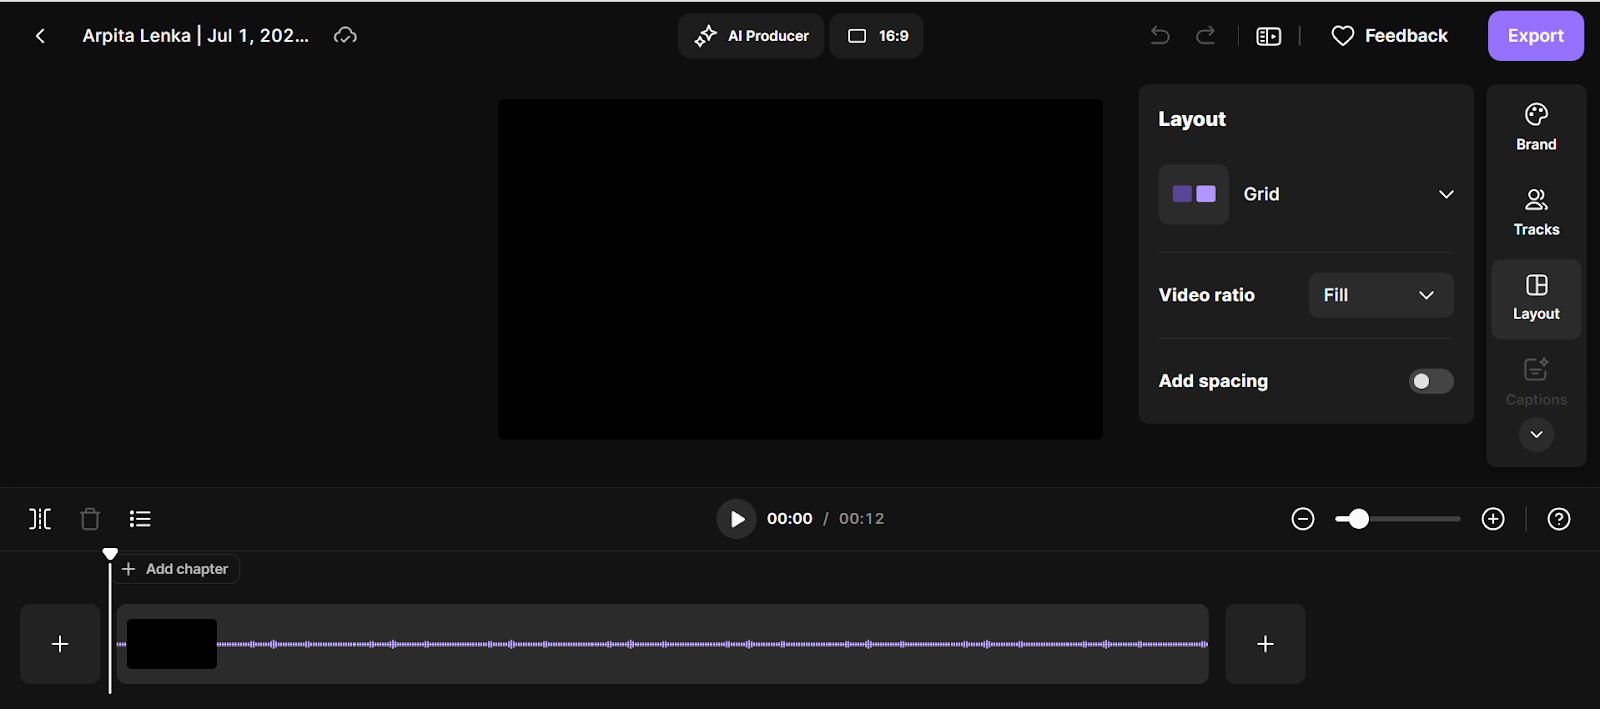
- Once you are done with editing, export the files.
And all done!
Before you leave here’s a limitation of Riverside that you should keep in mind:
You cannot share host capabilities, which means if you’ve created the account for your company and want someone else to host the interview, that would not be possible. You’ll either need to be on the call to start and stop the recording, or you’ll need to share your account details and password with the person who’s going to run the interview.
So, my advice: Create a shared company account specifically for hosting interviews. This way, any authorized person can use the account to host interviews without needing to share personal account details.
And you are good to go.
Author:
Arpita Lenka
Helping you create more content with less effort.
